Remove the old to make way for the new.
Consideration number one is whether or not the old units are to be kept. Are you planning to re-use them, sell them or give them to someone else for re-use? Naturally if this is the case you need to take extra care with the removal of the old units, but if they are just being scrapped you can use a bit more blunt force!
There is a high risk of injury from splinters, glass and tile shards, masonry and sharp edges on metal brackets, screws etc. Eye protection is essential, safety boots and gloves too, and ear defenders are recommended.
First move will usually be to remove all the doors. The hinges will be fixed with a single screw to the hingeplate, and more modern hinges will simply clip off. Next remove the plinths, which will normally just pull away, but may be screwed in place.
Appliances
Always a good place to start, and often you might want to keep some of your appliances, so remove again with care.
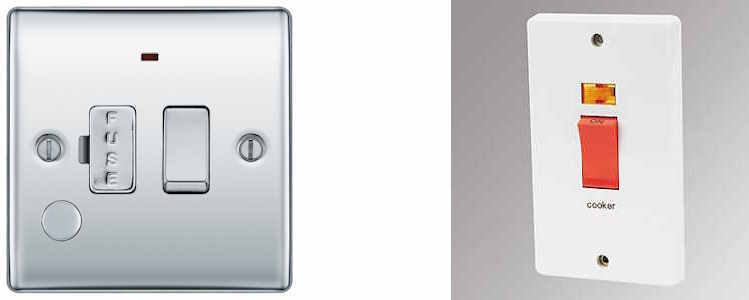
Fused spur switch Cooker switch
Free standing appliances are straight forward as they will not be fastened in place, but you will need an electrician to disconnect a cooker. Anything connected to the electrical system by a normal plug can be switched off and unplugged, it is then safe to remove. However sometimes even free standing appliances are "hard-wired" into a wall switch called a Fused Spur and the services of an electrician will be needed.
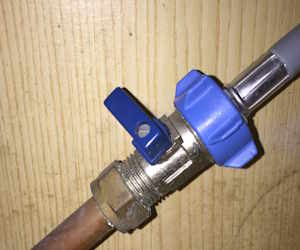
Washing machines and dishwashers will have a water feed in addition to their electrical connection, but this is usually safe and simple to disconnect as it is normal to have an isolating valve which shuts down the water supply where the flexible inlet pipe is attached to the household plumbing. When this valve is turned off the inlet pipe can be simply unscrewed. Usually a dishwasher is connected to the cold water supply only, a washing machine may be cold only or could be connected to both hot and cold.
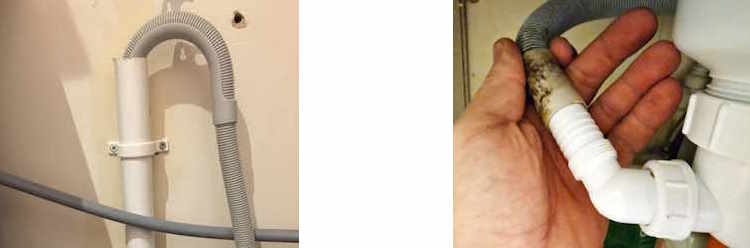
There will also be a waste outlet pipe, a thicker rubber hose, often with a hooked end, which simply sits into the household waste pipe, but can sometimes be connected by a plastic screw fitting into the trap below your sink.
Built in appliances such as ovens and hobs will be screwed into their housing unit or clamped into the worksurface. A single oven will often be connected to the electrical supply by a normal plug, but double ovens and hobs will be hard wired into a cooker switch and you will need an electrician for disconnection. Cooker hoods may have a regular plug but may also be hard wired and can of course have the added complication of the ducting to extract steam.
The ducting is not normally difficult to disconnect as it is usually only pushed together plastic pipes and fittings, but age and build up of grease can sometimes mean these connections will put up a bit of a fight.
Sink
There are several different styles of sink, but the most commonly found today is the inset sink. These can be manufactured from steel, plastic, ceramics or composite stone materials, but the removal is always by the same method. Occasionally you might see an undermounted sink, which fits to the underside of a worktop and has no rim or lip showing above worktop level. You may also encounter a sit-on sink which is fixed directly onto the carcass, or a Belfast style ceramic sink, again set directly onto a dedicated carcass.
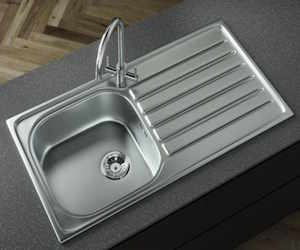
The inset sink is fitted into the worksurface through an appropriately sized hold and clamped in place with screw-tight sink clips. There is usually a rubber sealing strip or sometimes a silicone bead seal between the base of the sink and the worktop.
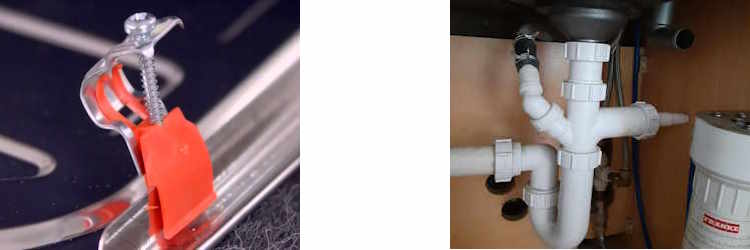
typical sink clips typical kitchen sink waste
Underneath will be the feed pipes to the tap and the waste connection. Look for isolating valves similar to the washing machine type above on the hot and cold tap supply and turn these off. The pipes on the tap side can now be disconnected, and the waste fitting will simply unscrew from the underside of the sink bowl. Just be aware that there will be a small amount of residual water in this pipework, so a towel or a strategically placed bucket will be required. With the plumbing disconnected the sink clips can be slackened off and the sink will lift out with a little jiggling about. You might need to run a knife between the sink and worktop to release the sealing strip.
Sometimes the clips, particularly at the rear of the sink, can be awkward to reach and it may be easier to actually remove the worktop section holding the sink all in one piece.
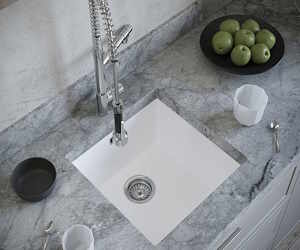
The undermount sink will only be found with solid timber, solid stone, composite stone or glass worktops as they are not suitable for installation in a laminate surface because of the waterproofing around the cut out. They tend to be bonded on from below the worksurface, and even where you can see retaining clips, you will find that the sink has been well bonded on too. The adhesives used are strong and it can be difficult to detach the bowl. After de-plumbing as above, it is normally easier to remove that section of worktop with the undermount sink in place. nb. frequently the tap will be fitted into the worksurface rather than the sink, but it still needs disconnecting.
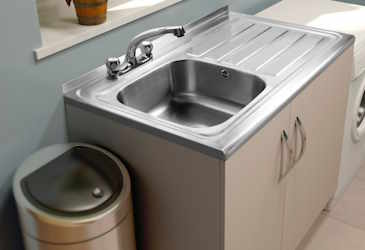
Sit-on sinks have no worktop below, but are fixed directly onto the kitchen cupboard, and the fixing method might vary, particularly with the age of the installation. Often a sit on sink will have been bonded to the carcass with a silicone or similar adhesive, some will have clips or brackets with short screws fastened into the bottom rim of the sink, and in some very crude jobs the sink might have been drilled from the top and screwed into the carcass below. Thankfully this last method is rare, but I have seen it! Sometimes the upstand at the back edge of the sink will also be drilled and screwed to the wall, pretty crude too, but not that uncommon. However the sink is fixed into place, the first step will be to de-plumb, and this procedure is the same as above; turn the water supply off and disconnect the feed to the taps and then the waste. Next cut the seal between the worktops (if there are any) and either side of the sink with a knife. Remove any screws or brackets you can see securing the sink, and lever it off the base unit. It is more then likely the sink will have been glued down as well as screwed. It's likely you will need to use some effort to break the bond, so be prepared for a possible struggle.
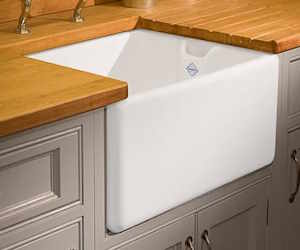
Belfast sinks and similar, like a London sink and a Butlers sink are large ceramic bowls without drainers. Take care with any of these as they are heavy! Belfast sinks can be fitted as undermount, where the worksurface covers the top rim of the sink, or as semi-inset, where the worksurface abuts the sides and back of the sink, but in either case the weight of the sink is carried on the kitchen unit below it. The unit below might have been reinforced to carry the weight of the sink. De-plumbing is pretty well as above, but the taps will be fitted into the worksurface or wall, so the sink can actually be removed after the waste is disconnected. There will be a substantial bead of silicone between the worksurface and the sink, which is normally all that holds it in place, although is might be stuck to the carcass below. Its a matter of try it and see, cut the silicone with a knife and jiggle the sink out gradually, and mind the weight! Where the sink is undermounted it will probably mean the worktop has to come off first.
Worktops and trims
It might be an idea to remove the wall units before the worksurfaces, to offer something to stand on when taking the wall units down. Just a thought, and entirely personal preference.
How the worksurfaces are fixed onto the units will depend on the type of worktop. Remember that all worktops are heavy, particularly stone and composite stones, so take extreme care when lifting and always try to have help available. In most cases any splashback fixed onto the wall will overlap the worksurface and need to be removed first. These are normally stuck in place with an adhesive and will need to be prized off by slotting a lever of some sort in behind. In the case of tiles, wiggling the worksurface up and down may free it enough to remove.
Laminate worktops are generally screwed onto the carcass, with screws upwards through the carcass front rail, or through L brackets further back on the carcass sides. Remove all the screws and your worktop will lift off. There will usually be a bead of silicone between the worktop and the wall, especially behind the sink area, but this will usually pull away easily. If it gives problems, just cut through with a knife. Most likely the corner joints will be glued and fastened with worktop bolts (dog bone bolts) underneath. These can be a bit of a fiddle to remove as it can be awkward to access them under the worktop, but once removed the joint should be easy enough to split apart by lifting one side up, or by driving a blunt chisel or large screwdriver in from above.
Solid timber worksurfaces will be fixed much as above and will unscrew and remove with relative ease. Th joints will likely be made in the same way as above.
Tiled worksurfaces are formed on site by fixing ply or some type of particle board to the carcass and then tiling on top with a quality waterproof adhesive and usually finishing with an epoxy grout. A timber lip is then stuck, screwed or both onto the front edge. The tops will unscrew as above, the front edge trim will most likely need to be chipped off with a hammer and chisel as any screws would normally be countersunk and hidden with a wood filler. The corner joints will be difficult to see but should break easily by lifting the worksurface on one side. Take great care as this process is likely to break the tiles and cause very sharp splinters and edges. Worktop jointing bolts are unlikely to have been used, but possible. More likely are timber strips screwed across the corner joints from below. Take a good look underneath to see, either joint fixing will not be difficult to undo.
Stone and Composite worksurfaces are usually stuck onto the carcass with silicone. This can take a while to release, you need to be patient, however in most cases, there is not too much adhesive as the weight of the worksurface and any upstand behind helps to anchor it in place. Take your time, loosen the worktops by wiggling up and down, a little at first and progressively more movement, and the tops will after a while come free. These worktops are particularly heavy so take care and seek help. They can also break, especially around sink or hob cut outs, leaving sharp edges.
Trims, usually on wall units and tall units, will be a cornice of some form on top and a light shield on the bottom of the wall units, if they are fitted. Sometimes these are left off as part of the design. They will be simply screwed in place, either by screws through the carcass or by using brackets and screwing into the outer surface of the carcass. Either way, undo the screws and the trims will lift right off. Any corner joints will likely be glued, but should break apart with reasonable ease, and normally the trim will remove in one piece without needing to consider any joints.
Wall and base units
Wall units will be screwed together through their side panels (gables) and likely fastened similarly to any tall units which they abut. The most common means of fixing onto the wall is by wall hanging brackets, but there is always a chance that the unit could be screw fixed directly to the wall.
Its best to remove the wall units one by one to avoid injury if several were to fall at the same time.
Undo any screws through the side panels holding the units together. Slacken off the wall hanging brackets, you will feel the unit starting to come free, lift it upwards slightly and ir will come away from the wall. Be careful and seek help, the larger double units can be quite heavy, and it's easy to overbalance while working at height.
If the units are screwed to the wall it's almost certainly a two person job to remove. One person to hold the unit while the other undoes the screws.
Base units will be screw fixed into the wall and also screwed together through their side panels (gables). After a systematic removal of all screws each carcass should simply lift out complete with the adjustable feet. Tall units will remove in the same way, but again take care as they can be very heavy.